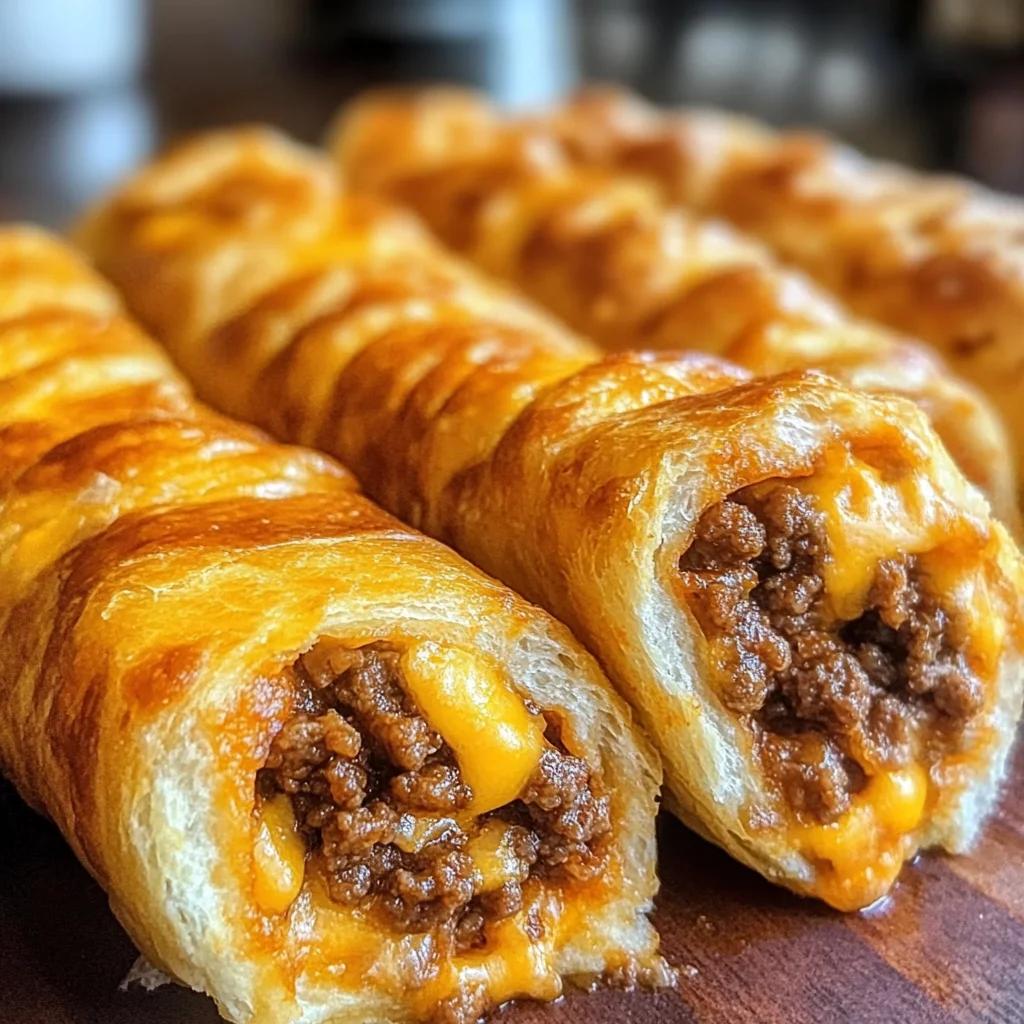
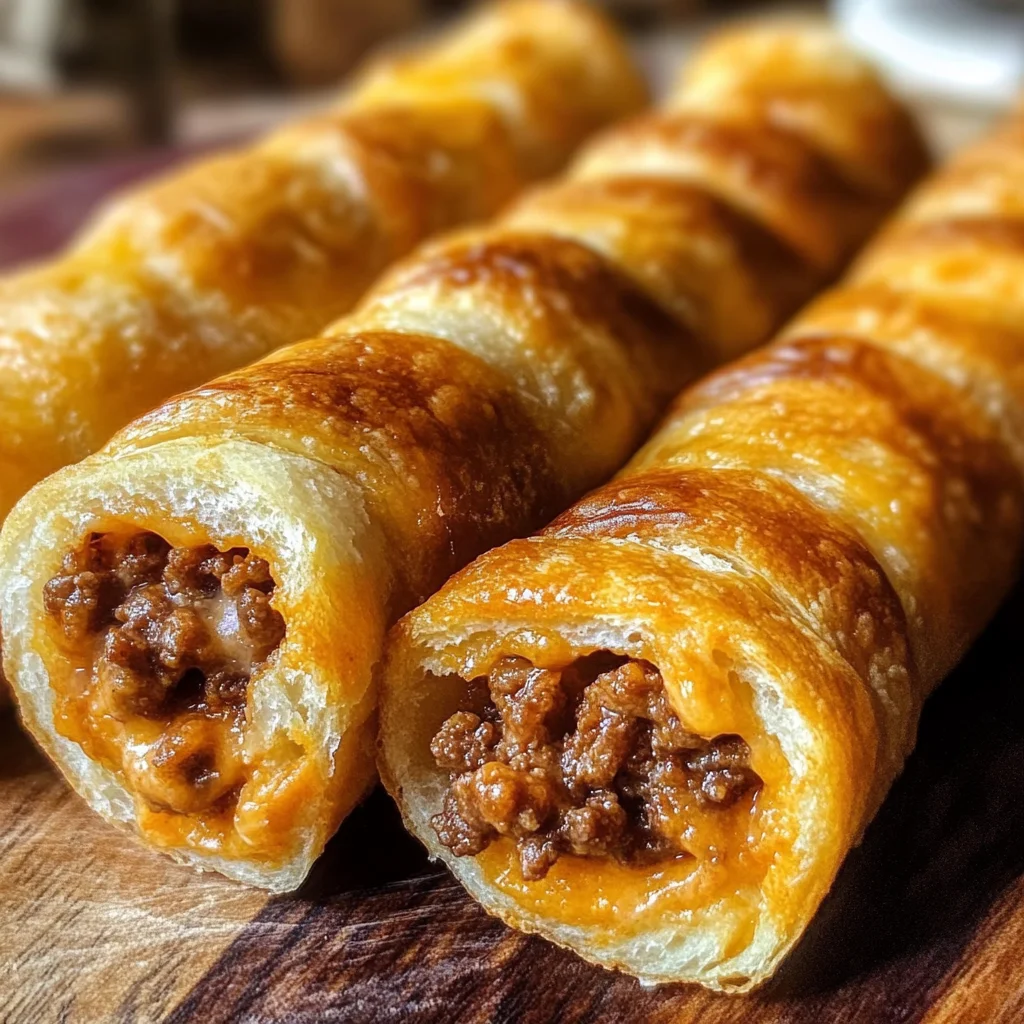
Cheesy Taco Stuffed Breadsticks with Taco Filling
If you’re looking for a fun and delicious way to spice up your snack game, then you’ve come to the right place! These Cheesy Taco Stuffed Breadsticks with Taco Filling are not just a treat; they’re a total crowd-pleaser. I love making them for family gatherings or even just a cozy movie night at home. The combination of cheesy goodness and savory taco flavors wrapped in soft bread is simply irresistible!
What I adore about this recipe is its versatility. You can whip it up quickly on busy weeknights or impress guests at your next gathering. Trust me, once you make these, they’ll become a staple in your kitchen!
Why You’ll Love This Recipe
- Quick and Easy: With just a few simple steps, you can have these tasty breadsticks ready in no time!
- Family-Friendly: Kids and adults alike will love the cheesy, flavorful filling that’s perfect for dipping.
- Make-Ahead Option: You can prepare the filling in advance, making it super easy to assemble when you’re ready to bake.
- Customizable: Feel free to get creative with the fillings and dips to suit everyone’s taste.
- Delicious Flavor: The combination of gooey cheese and seasoned beef makes every bite absolutely mouthwatering.
Ingredients You’ll Need
These are simple, wholesome ingredients that come together beautifully in this recipe. Get ready for some cheesy goodness!
For the Breadsticks
- 1 can refrigerated pizza dough
- ½ pound ground beef
- 1 packet taco seasoning
- 1 cup shredded cheddar cheese
- 1 cup shredded mozzarella cheese
- 1 tablespoon butter, melted
- ¼ teaspoon garlic powder
For Dipping
- Salsa
- Sour cream
Variations
One of the best things about these Cheesy Taco Stuffed Breadsticks with Taco Filling is how flexible they are! Here are a few ideas to switch things up:
- Swap the protein: Try using ground turkey or chicken instead of beef for a lighter option.
- Add veggies: Toss in some chopped bell peppers or onions for extra crunch and flavor.
- Make it spicy: Add jalapeños or a sprinkle of crushed red pepper for those who like a kick.
- Go vegetarian: Replace the meat with black beans or lentils mixed with taco seasoning for a delicious plant-based version.
How to Make Cheesy Taco Stuffed Breadsticks with Taco Filling
Step 1: Preheat Your Oven
Start by preheating your oven to 375°F (190°C). This ensures that your breadsticks will bake evenly and come out perfectly golden brown.
Step 2: Cook the Beef
In a skillet over medium heat, cook the ground beef until it’s browned. Make sure to drain any excess fat; we want our filling to be nice and lean! Stir in the taco seasoning according to packet instructions and let it cook for another 2–3 minutes. This step is key because it allows all those wonderful flavors to meld together.
Step 3: Prepare the Dough
Roll out the pizza dough on a lightly floured surface into a large rectangle. This might feel like an art project, but trust me, it’s so satisfying! Once it’s rolled out, spread the seasoned taco meat evenly over one half of the dough.
Step 4: Add Cheese
Now comes the fun part—sprinkle both cheddar and mozzarella cheeses generously on top of the taco meat. The more cheese, the better!
Step 5: Fold and Cut
Fold the dough over the filling to enclose it completely. Press down on the edges to seal everything in tight; we don’t want any cheesy goodness escaping! Then cut the stuffed dough into 1-inch-wide strips. Twisting each strip gently gives them that beautiful shape before placing them on your prepared baking sheet.
Step 6: Bake
Brush the tops with melted butter and sprinkle them lightly with garlic powder. Bake for 15–20 minutes or until they turn golden brown and crispy. Your kitchen will smell amazing during this time!
Step 7: Serve Warm
Once they’re out of the oven, serve these delightful breadsticks warm with salsa and sour cream for dipping. Get ready for compliments—they’re going to disappear fast!
Pro Tips for Making Cheesy Taco Stuffed Breadsticks with Taco Filling
These cheesy taco stuffed breadsticks are sure to be a hit, and with a few simple tips, you can make them even better!
-
Use fresh pizza dough: While refrigerated pizza dough works perfectly, using fresh dough from your local pizzeria or bakery can enhance the flavor and texture of your breadsticks.
-
Let the filling cool: Allowing the taco filling to cool slightly before spreading it on the dough helps prevent sogginess, ensuring a delightful crunch when baked.
-
Experiment with cheeses: Don’t hesitate to mix and match different types of cheese. Adding pepper jack for a little kick or cream cheese for extra creaminess can elevate the flavor profile.
-
Brush generously with butter: A good brush of melted butter not only adds flavor but also contributes to that beautiful golden-brown finish that makes these breadsticks irresistible.
-
Serve immediately: These breadsticks are best enjoyed fresh out of the oven while they’re warm and crispy. If you have leftovers, reheat them in the oven to maintain their crunch.
How to Serve Cheesy Taco Stuffed Breadsticks with Taco Filling
Presentation is key when serving these delicious breadsticks! Here are some fun ideas to make your dish look as good as it tastes.
Garnishes
- Chopped fresh cilantro: Sprinkling some chopped cilantro on top adds a burst of color and freshness that pairs wonderfully with the flavors.
- Sliced jalapeños: For those who love a bit of heat, adding sliced jalapeños on top can give an extra spicy kick and an appealing look.
Side Dishes
- Guacamole: Creamy guacamole complements the cheesy goodness perfectly and adds a refreshing contrast to the spices in the taco filling.
- Mexican Street Corn Salad: This vibrant salad made with corn, lime, cilantro, and cotija cheese brings bright flavors that balance well with the richness of the breadsticks.
- Refried Beans: A side of refried beans provides a hearty addition that rounds out your meal beautifully while staying true to Tex-Mex cuisine.
- Crispy Tortilla Chips: Serve alongside tortilla chips for an extra crunch. They’re perfect for dipping into salsa or guacamole.
With these serving suggestions, your cheesy taco stuffed breadsticks will not only taste fantastic but also look like something straight out of a restaurant! Enjoy sharing this delightful dish with family and friends!
Make Ahead and Storage
These Cheesy Taco Stuffed Breadsticks with Taco Filling are perfect for meal prep! You can make them in advance and store or freeze them, allowing you to enjoy this delicious snack whenever you want.
Storing Leftovers
- Place any leftover breadsticks in an airtight container.
- Store in the refrigerator for up to 3 days.
- Reheat in the oven for best results to maintain crispiness.
Freezing
- Allow the breadsticks to cool completely.
- Wrap each breadstick individually in plastic wrap, then place them in a freezer-safe bag.
- Freeze for up to 2 months.
Reheating
- Preheat your oven to 350°F (175°C).
- Unwrap the frozen breadsticks and place them on a baking sheet.
- Bake for about 10-15 minutes or until heated through and crispy.
FAQs
Here are some common questions that might help you with making these delightful breadsticks!
Can I use another type of meat for the Cheesy Taco Stuffed Breadsticks with Taco Filling?
Absolutely! Ground turkey or chicken can be great alternatives. You can also try using vegetarian crumbles if you’re looking for a meatless option.
How do I make the Cheesy Taco Stuffed Breadsticks with Taco Filling spicier?
To add some heat, consider mixing diced jalapeños or crushed red pepper flakes into the taco filling. You can also serve them with a spicy salsa!
Can I use homemade pizza dough instead of refrigerated pizza dough?
Yes, homemade pizza dough works wonderfully! Just ensure it’s rolled out thin enough to hold all that cheesy taco goodness.
What dipping sauces pair well with these breadsticks?
Alongside salsa and sour cream, guacamole or a zesty ranch dressing would complement the flavors beautifully.
Final Thoughts
I hope you enjoy making these Cheesy Taco Stuffed Breadsticks with Taco Filling as much as I do! They’re not just delicious; they’re perfect for sharing at gatherings or enjoying during a cozy night in. Feel free to customize them to suit your taste, and don’t hesitate to reach out if you have any questions. Happy cooking!
Cheesy Taco Stuffed Breadsticks with Taco Filling

Enjoy cheesy goodness with these Cheesy Taco Stuffed Breadsticks with Taco Filling — a fun snack that’s easy to make and sure to please everyone!
- Prep Time: 15 minutes
- Cook Time: 20 minutes
- Total Time: 35 minutes
- Yield: Makes about 8 breadsticks 1x
- Category: Snack
- Method: Baking
- Cuisine: Tex-Mex
Ingredients
- 1 can refrigerated pizza dough
- ½ pound ground beef
- 1 packet taco seasoning
- 1 cup shredded cheddar cheese
- 1 cup shredded mozzarella cheese
- 1 tablespoon butter, melted
- ¼ teaspoon garlic powder
Instructions
- Preheat your oven to 375°F (190°C).
- In a skillet over medium heat, cook the ground beef until browned. Drain excess fat and stir in taco seasoning; cook for an additional 2–3 minutes.
- Roll out pizza dough into a rectangle on a floured surface. Spread the seasoned meat over half of the dough.
- Sprinkle cheddar and mozzarella cheeses over the meat.
- Fold the dough over to enclose the filling; seal edges tightly. Cut into strips and twist each strip gently before placing on a baking sheet.
- Brush tops with melted butter and sprinkle garlic powder. Bake for 15–20 minutes until golden brown.
- Serve warm with salsa and sour cream for dipping.
Nutrition
- Serving Size: 1 breadstick (50g)
- Calories: 180
- Sugar: 0g
- Sodium: 350mg
- Fat: 10g
- Saturated Fat: 5g
- Unsaturated Fat: 4g
- Trans Fat: 0g
- Carbohydrates: 14g
- Fiber: 1g
- Protein: 8g
- Cholesterol: 25mg